MemberPrism2
MemberPrism Documentation
⚠️ This document was translated into English by deepl and can be improved by PR
Introduction
MemberPrism is an open source project for providing membership, subscription and content protection features to existing websites, especially static ones.
It features a plug-in approach that allows you to add functionality immediately with a few lines of code. At the same time, these features are implemented in a floating layer format, so that users do not need to leave the site to complete the above features.
Features
MemberPrism currently provides the following features.
- Membership Management
- Registration
- Login
- Logout
- Change user level: user/admin
- Subscription Management
- Add, modify, delete, deactivate subscription plans
- Subscribe to a plan through a link
- User modify, unsubscribe
- Member content protection
- Add, modify, delete, deactivate member content
- Assigning member content to a subscription plan
- Front-end protection of member content via JavaScript
- Back-end protection of member content via MemberProxy
Screenshot
Installation
Installation via Docker
For easy installation, we provide the Docker installation method. It is also recommended to use this method in preference.
Dependency Environment
First, you need a container environment that supports git and docker-compose. If you don’t already have it, you can refer to this article use-docker-compose-on-ubuntu-20-04).
Initialization
Start by clone the project code
git clone https://github.com/easychen/MemberPrism2.git prism
Go to the directory and start the service with docker-compose
cd prism && docker-compose up -d
The service will start two ports.
- 8801: MemberPrism, the website
- 8802: MemberProxy, where users will access when backend protection is enabled
The ports for these two services can be adjusted by modifying the port section in docker-compose.yaml in the root directory.
ports:
    - '8801:80'
    - '8802:8802'
HTTPS Support
First, put the certificate in the ssl directory.
Open docker/web/vhost.conf and remove the comments before the following lines.
SSLEngine on
SSLCertificateFile /app/ssl/server.crt
SSLCertificateKeyFile /app/ssl/server.key
Open web/.env and change PRISM_HTTPS to true.
PRISM_HTTPS=true
Manual installation
The main part of MemberPrism is written in Laravel, so developers who are familiar with Laravel can easily build it.
Go to the web directory
cd /app/web
Install the dependencies via compser
composer install
Copy .env.example to .env and modify it as appropriate.
cp .env.example .env
Generate the app key
php artisan key:generate
Initialize the database and fill in the default account
php artisan migrate --seed
You need to make sure the following directories are writable, you can change them to 755 or 777.
chmod -R 0777 /app/web/storage
chmod -R 0777 /app/web/bootstrap/cache/
Start proxy
cd /app/proxy && . /server-linux &
If you are on a Mac environment, use
cd /app/proxy && . /server-mac &
Adding functionality to a website
First clarify the following terms.
TargetSite: the site where you need to add membership and subscription featuresPrismSite: default8801port corresponding to the main siteProxySite: default8802port corresponding to the proxy site
After installation, visit <ip>:8801 to access PrismSite.
Admin account
Login with the following account.
- Username:
admin@memberprism.com - Password:
admin
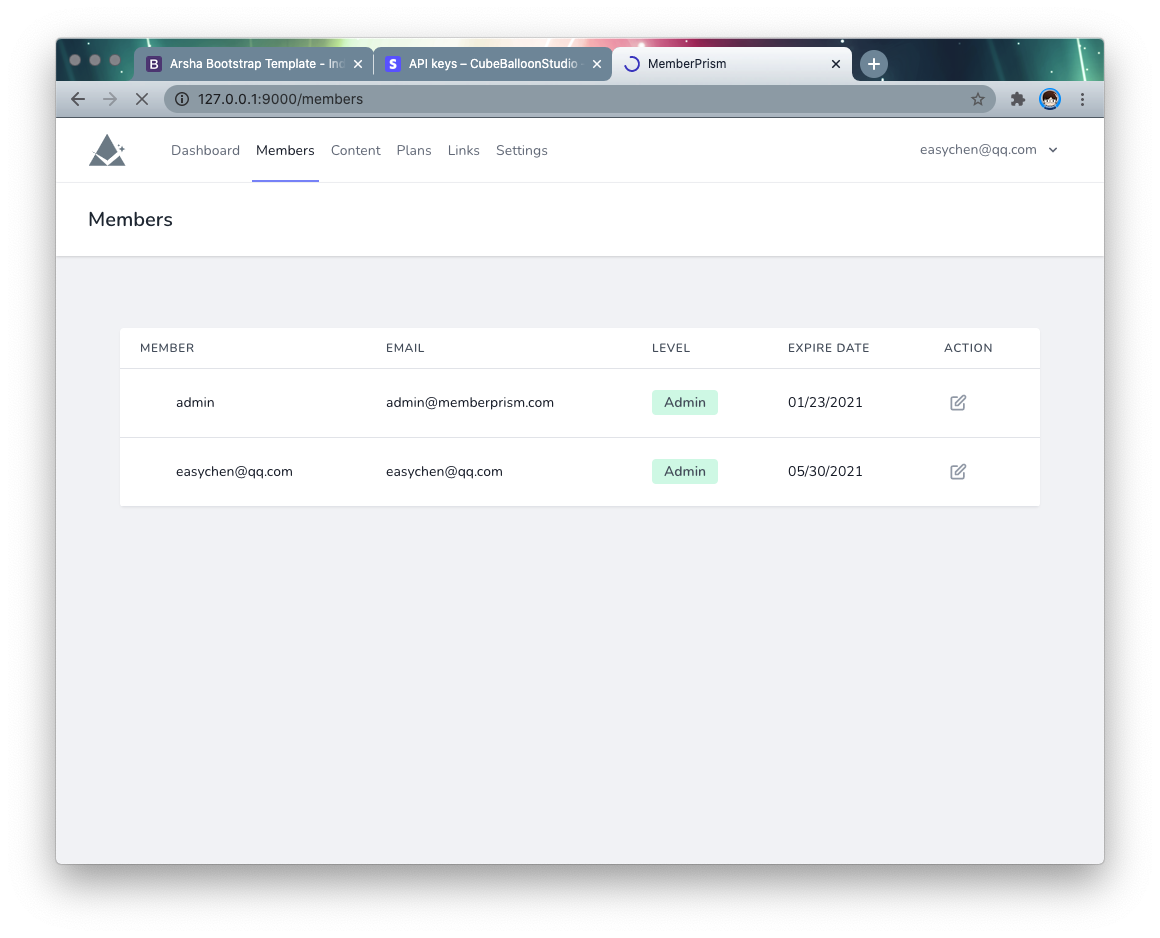
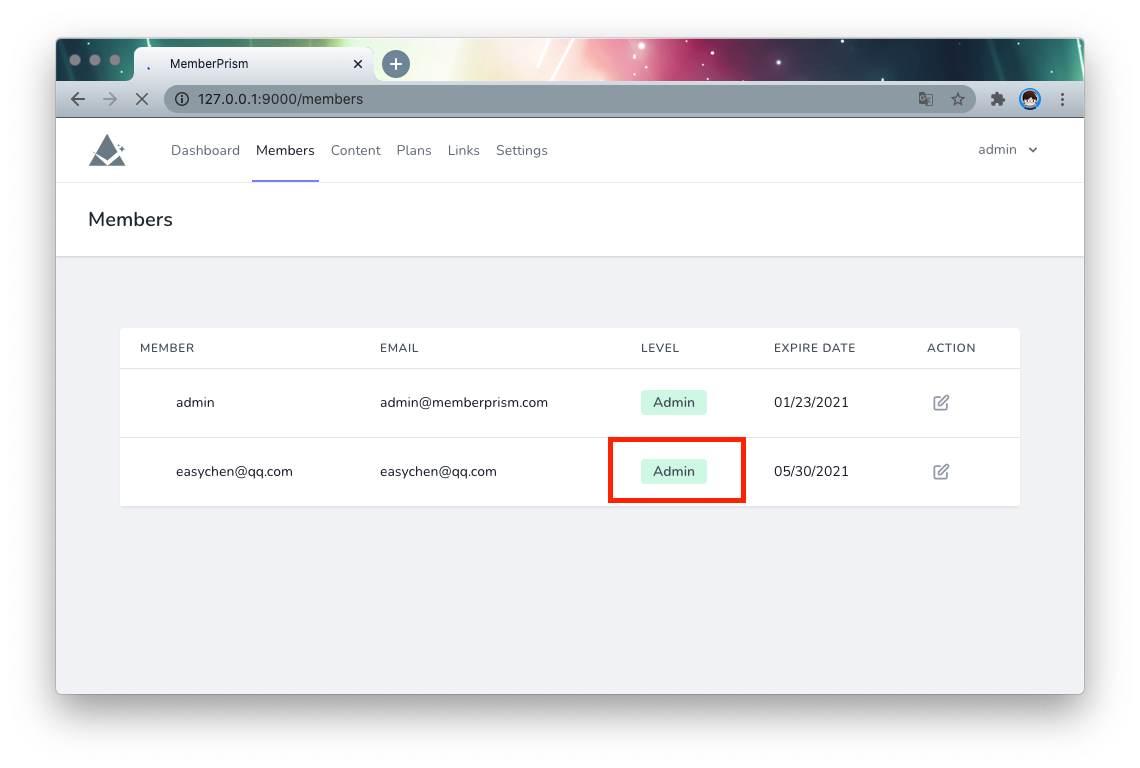
After logging in, go to the members page and click level to change the user’s level.
Configure the URL
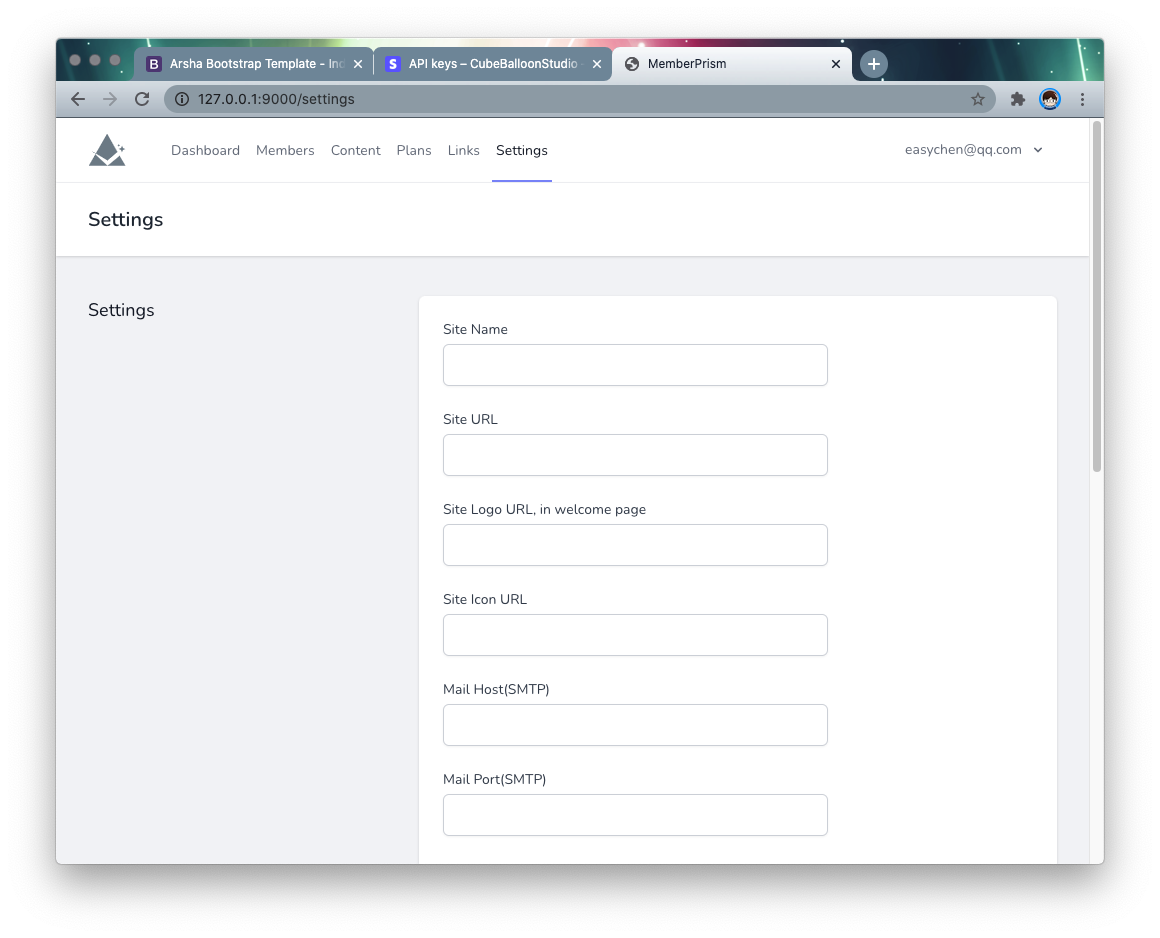
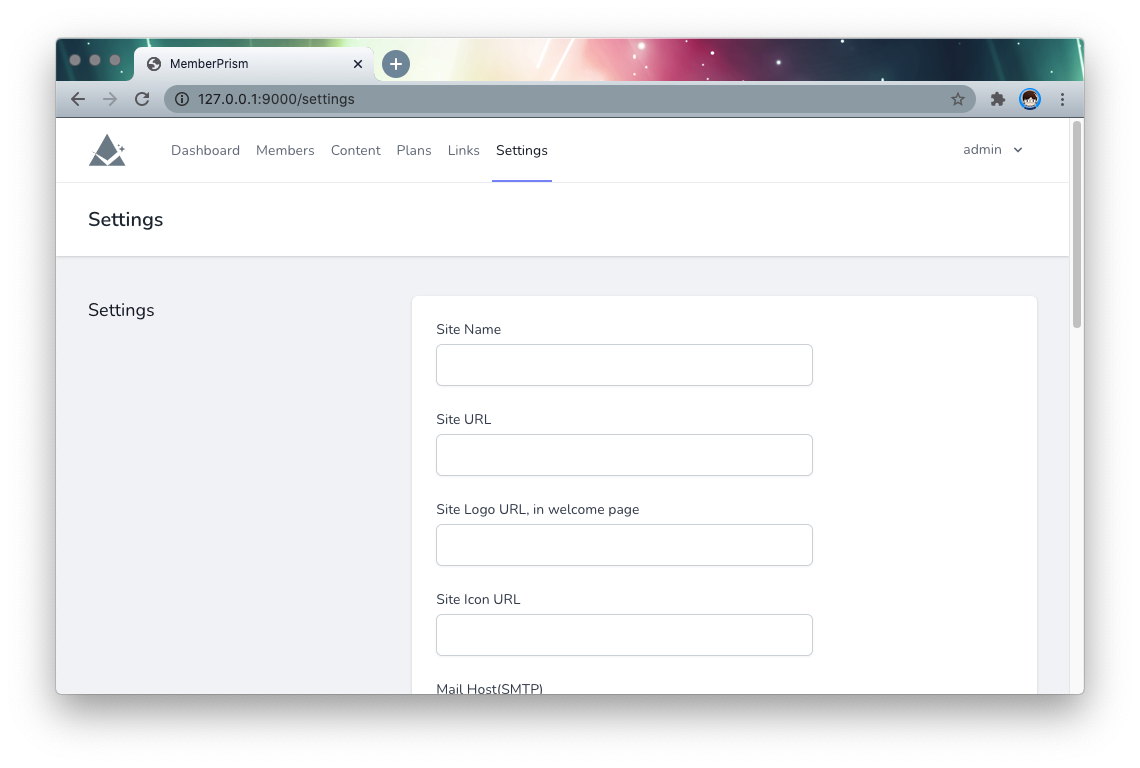
Go to the Settings page and set the name and URL of the PrismSite website. This URL will finally need to be accessible to TargetSite users.
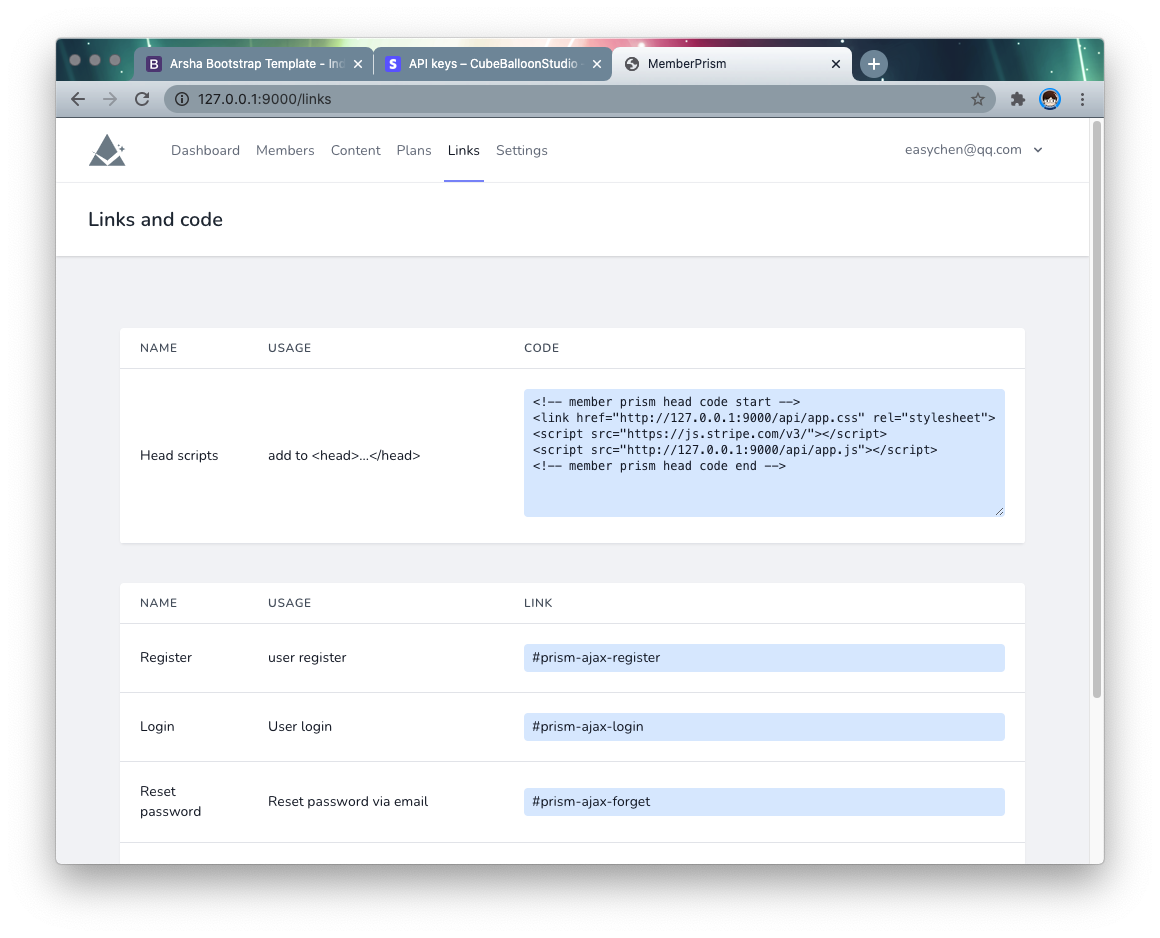
Get the installation code
Go to the Links page, copy Head scripts and paste it into the <head> tag on the TargetSite site page. Note that this code needs to be added to any page that wants to use the MemberPrism feature.
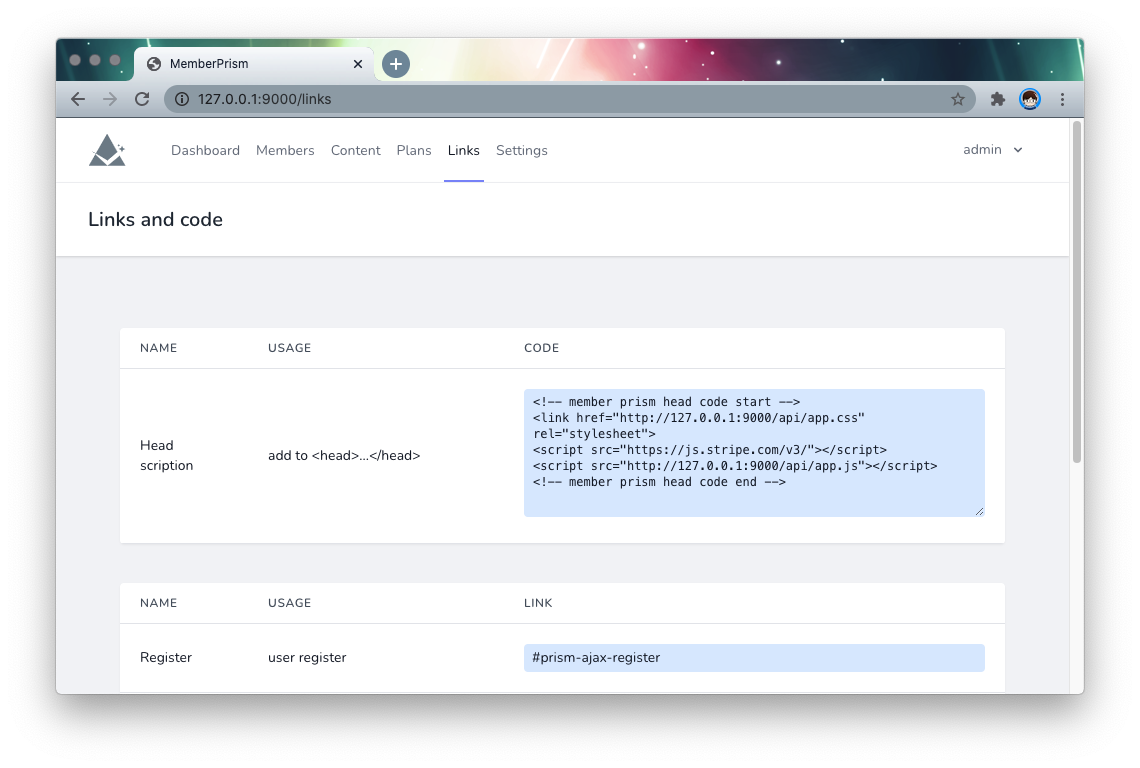
Copy feature links
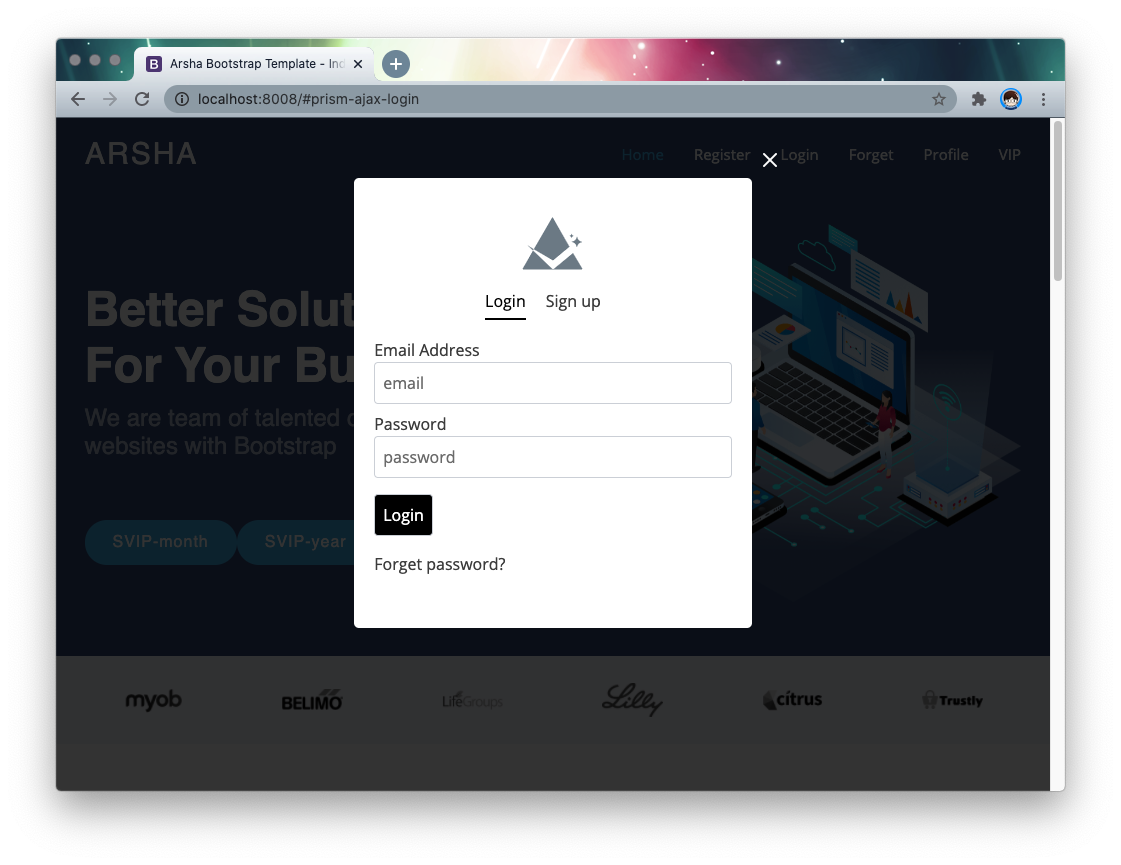
At the bottom of the Links page, there is the URL for Login, which can be copied and pasted into the corresponding link in TargetSite.
The code looks like
<a href="#prism-ajax-login">Login</a
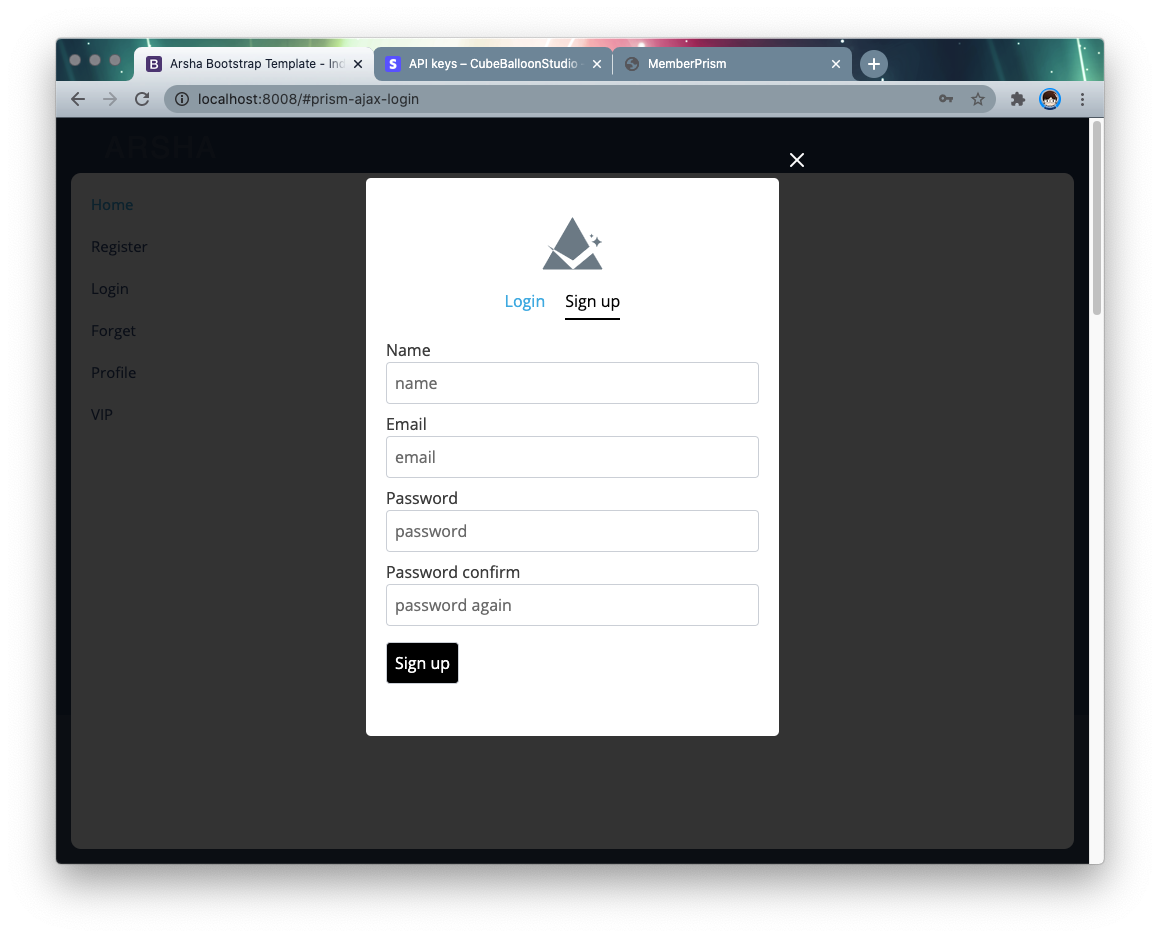
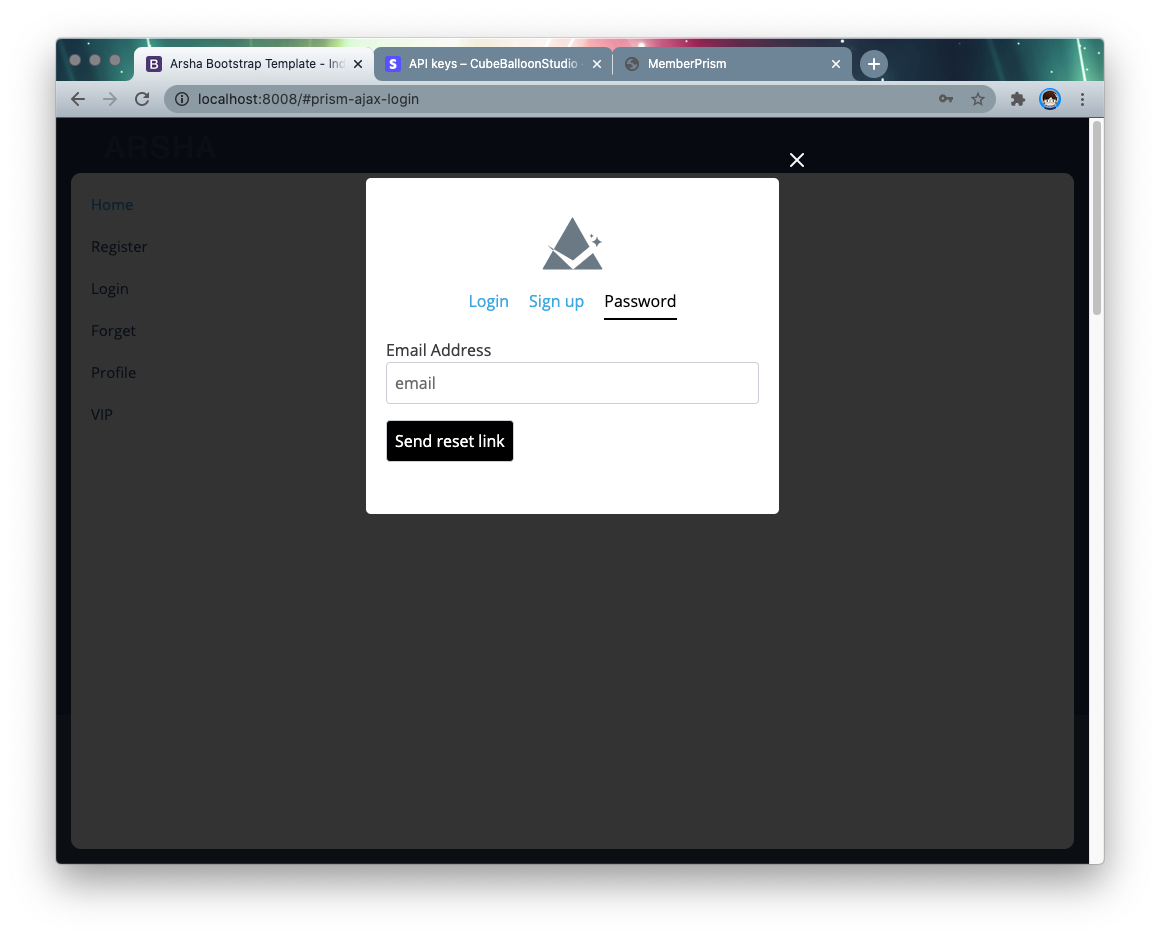
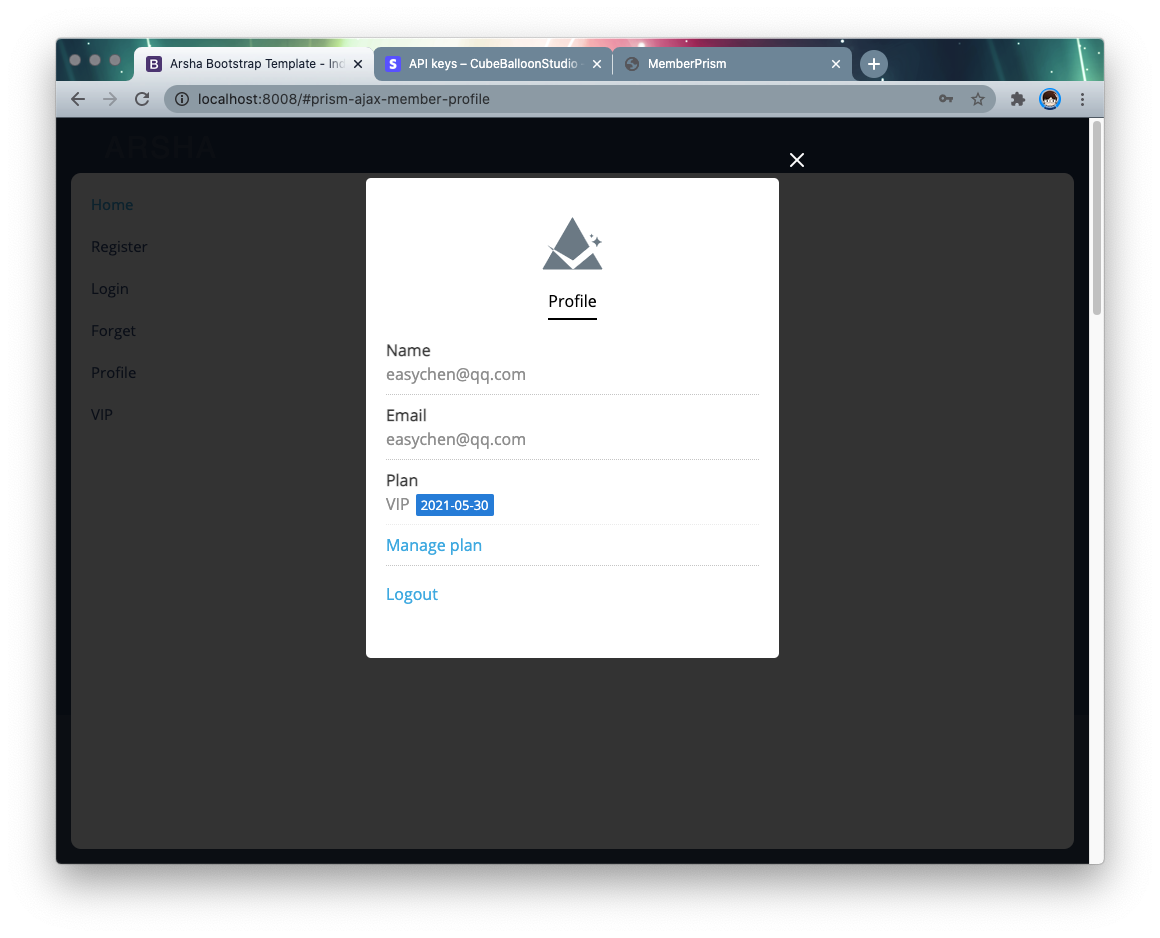
When clicked, the result looks like this.
After adding the registration, profile links, this site will have a user system.
Subscription configuration
MemberPrism uses Stripe to implement payment and subscription related features. This requires you to register a Stripe account first.
The following is an example of test mode.
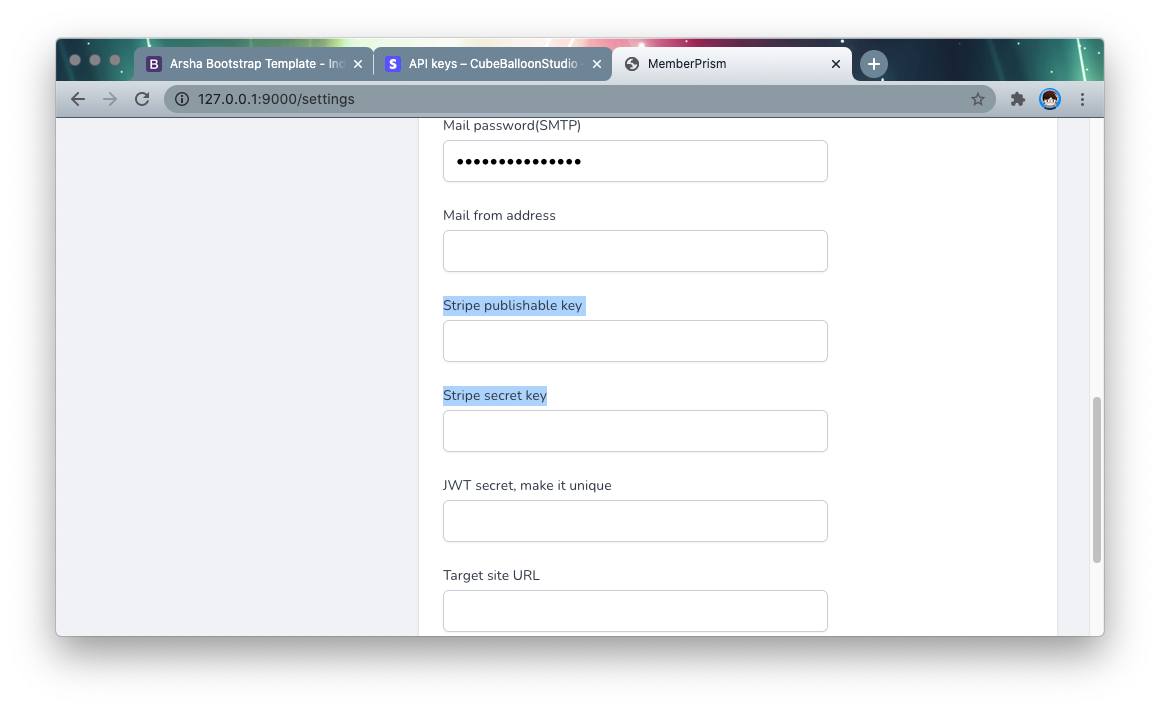
Configure Stripe Key
Open the API Keys page under the Developers menu.
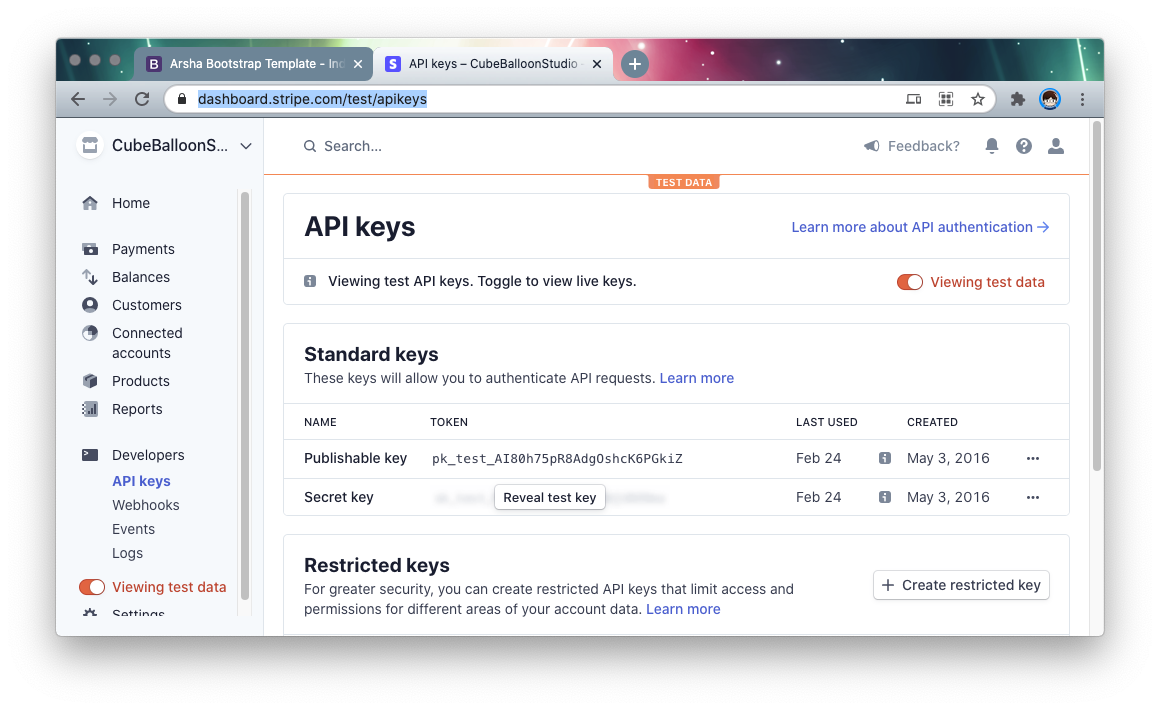
Copy the corresponding Key and fill in the corresponding option in Settings of PrismSite: !
Configure Stripe WebHook
Since users can make changes to their subscriptions on the Stripe website, subscription changes and payment confirmations in MemberPrism are made through a webhook.
The webhook requires an externally accessible URL, so it is recommended that you configure it after going live. If you are debugging locally, you can use ngrok for intranet penetration.
Suppose the URL of the PrismSite website is http://D.com, then the webhook endpoint URL is http://D.com/stripe/webhook.
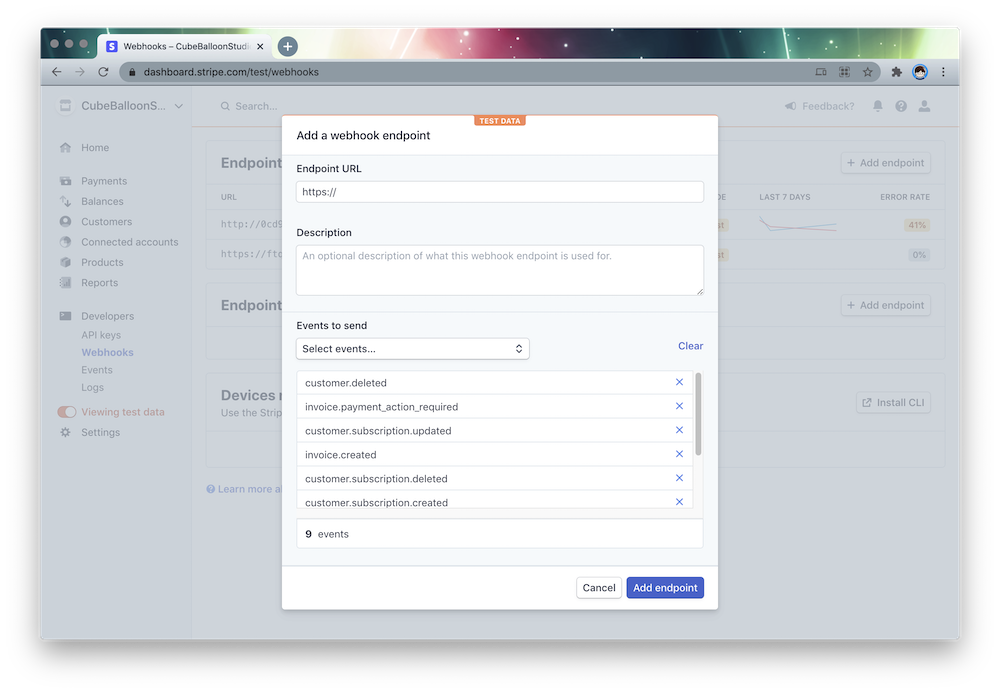
Select the following events at events to send.
- invoice.created
- invoice.paid
- invoice.payment_action_required
- customer.subscription.created
- customer.subscription.updated
- customer.subscription.deleted
- customer.created
- customer.updated
- customer.deleted
Note that customer.subscription.updated is a subscription change, which is not handled by default due to the cloud application-specific elevation logic behind it. You can implement it in app/Http/Controllers/WebhookController.php by yourself.
Create Price ID
Go to the Stripe dashboard and create a product.
Note that in the Pricing section, select Recurring so that it will automatically renew. Just fill in the rest of the fields as you want.
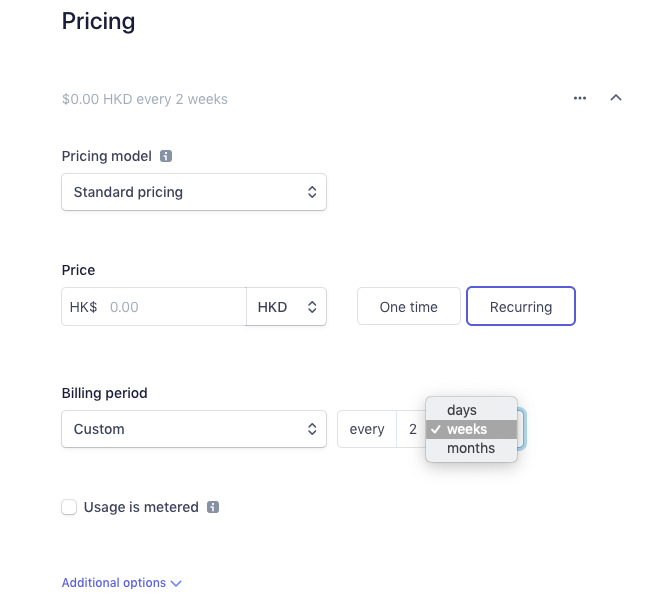
After creating the product, go to the product details page and you can see the API ID in the Pricing section and record it.

You can create multiple prices according to your needs, and each level of subscription, monthly and yearly payment should be a different price id. These price ids need to be recorded and will be used later when you create a subscription plan.
Creating a subscription plan
Go back to the PrismSite backend, go to the Plans page, and create a Plan. The price ids you need here are the same ones you created above.
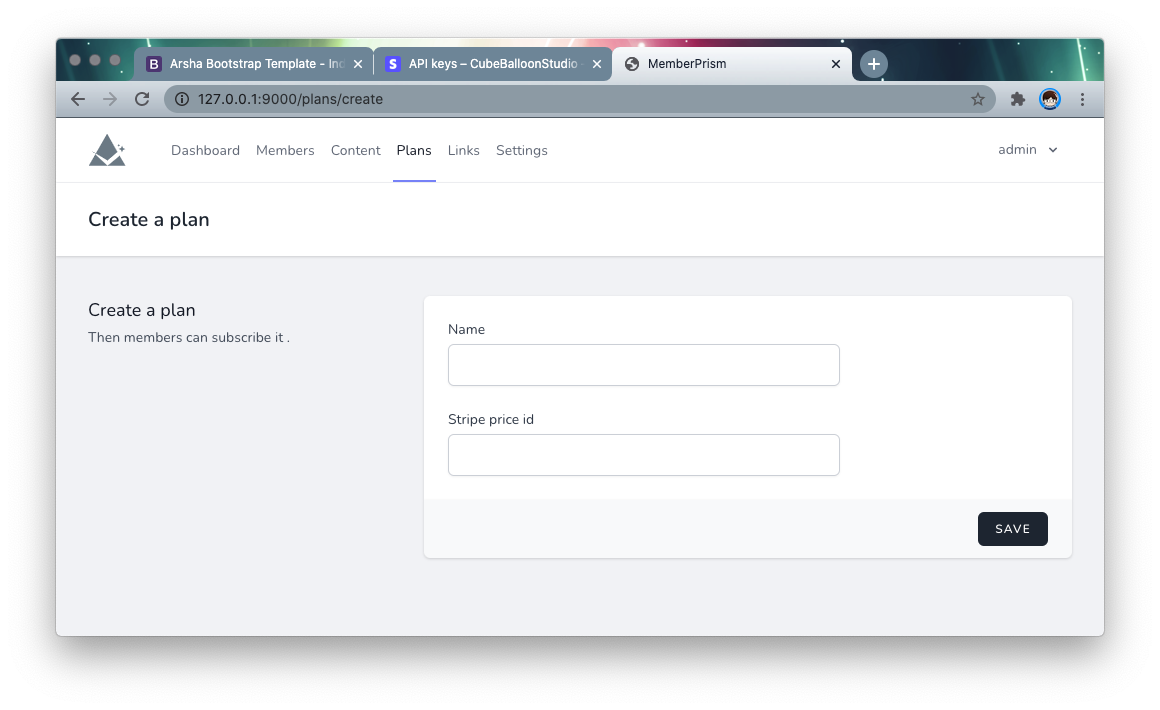
Fill in price id in order to create multiple Plans.
When you return to the Links page, at the bottom you can see the subscription links for the plan you just created.
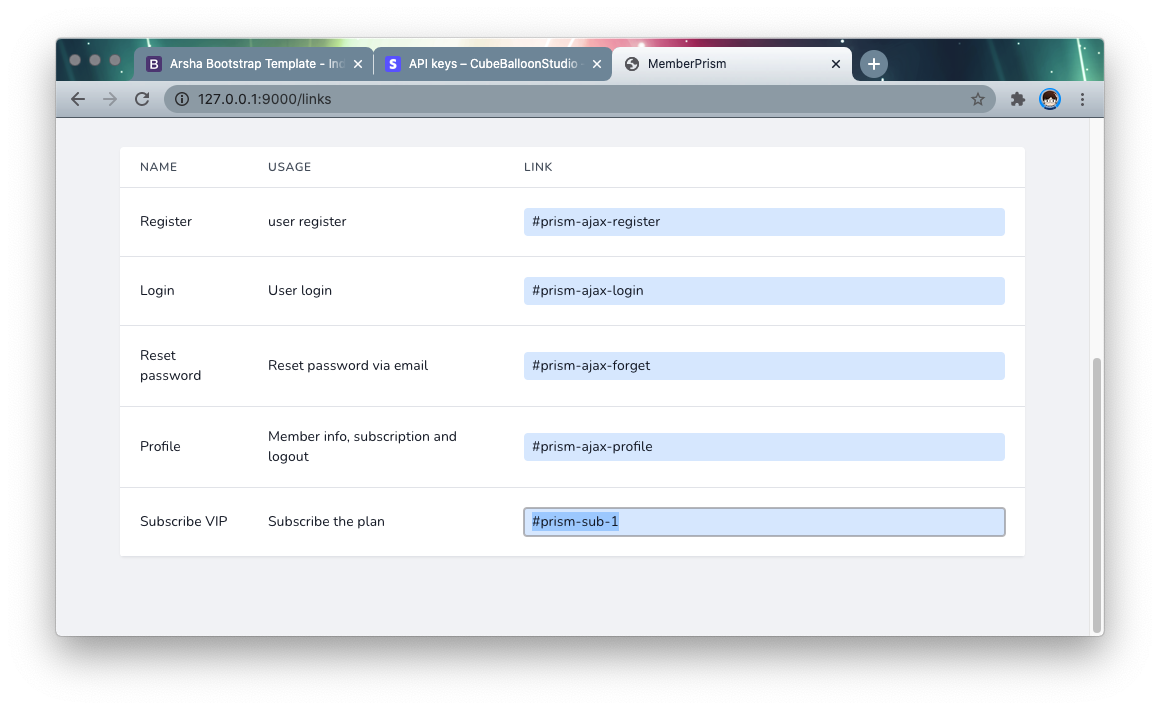
Add these links to the corresponding places in the TargetSite and the user will be redirected to the payment page when they click on it. (Login screen will be displayed for non-logged in users)
Member-only content protection
Suppose the URL in TargetSite is http://t.com/ and the member-visible content is placed in the vip directory. Now it is not protected and can be accessed directly through http://t.com/vip/some.html.
Next, we will protect this directory.
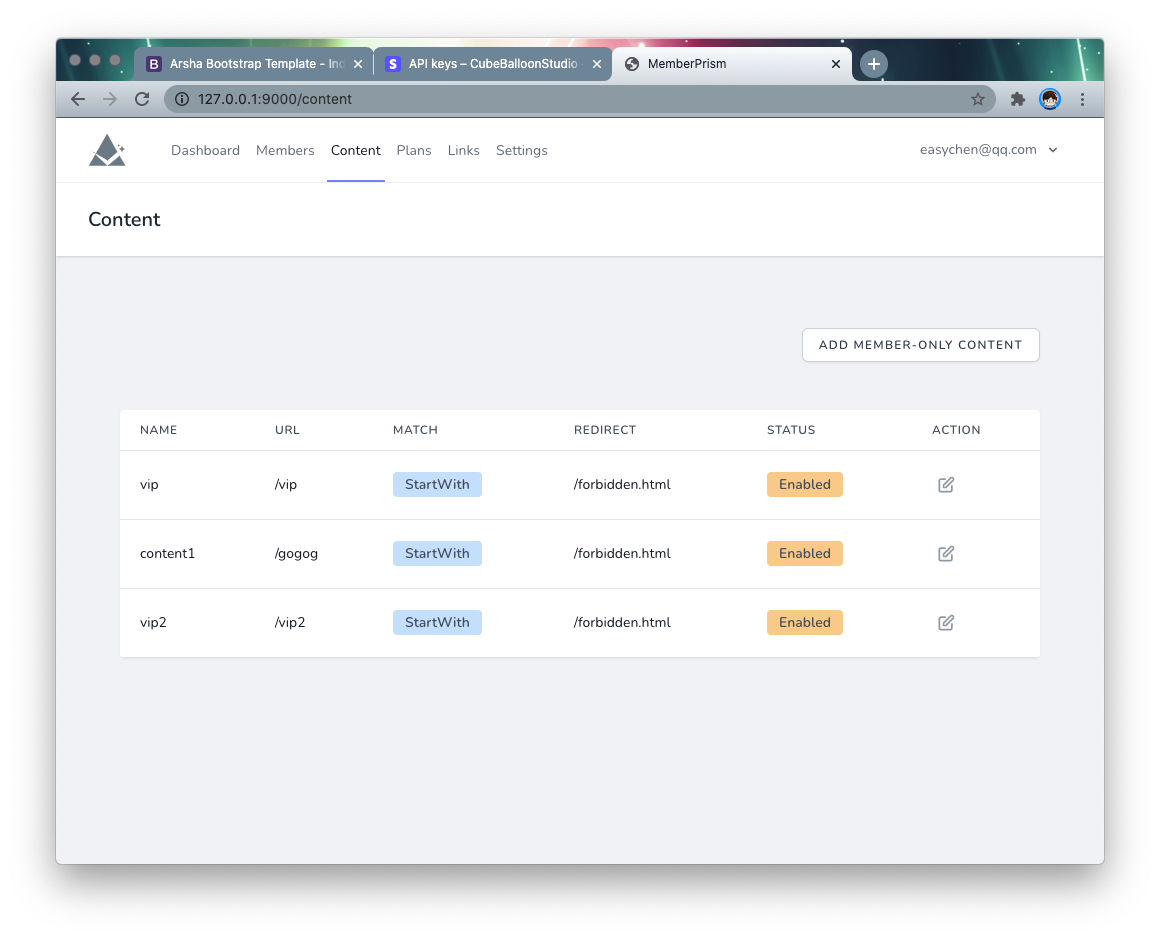
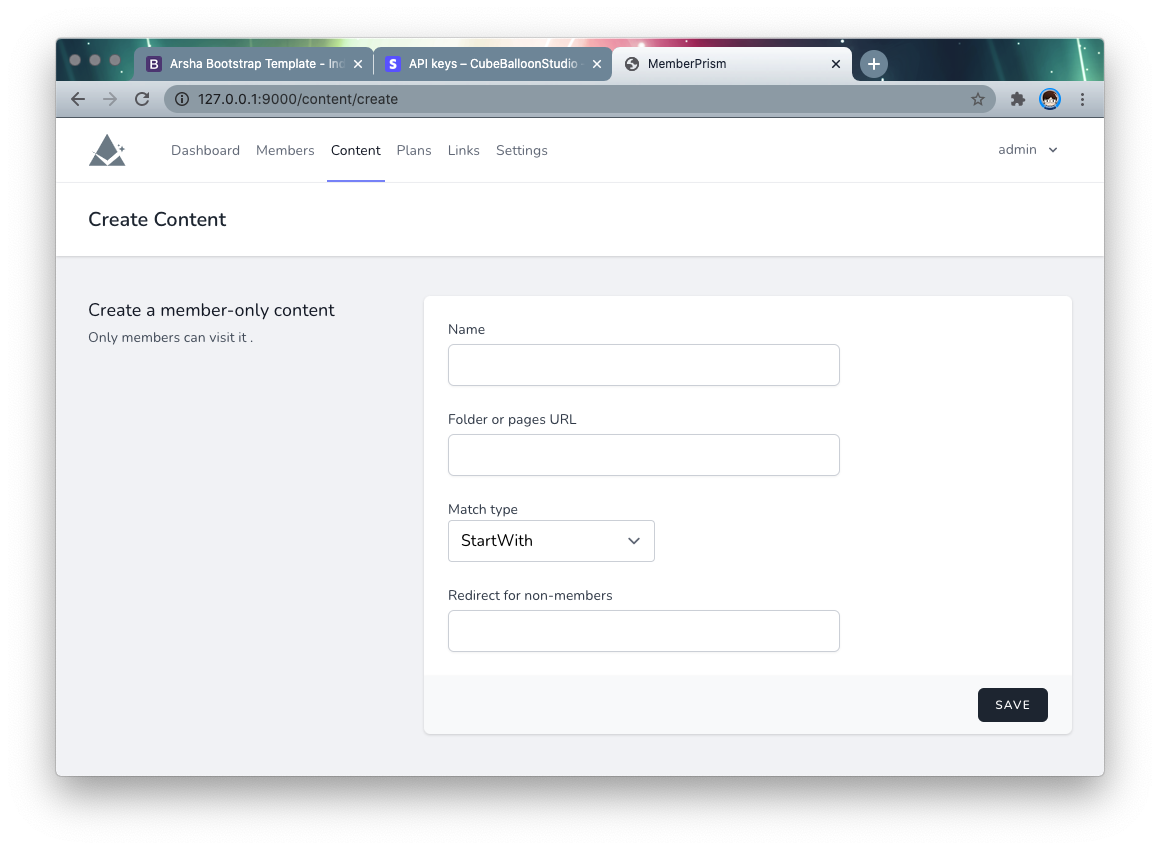
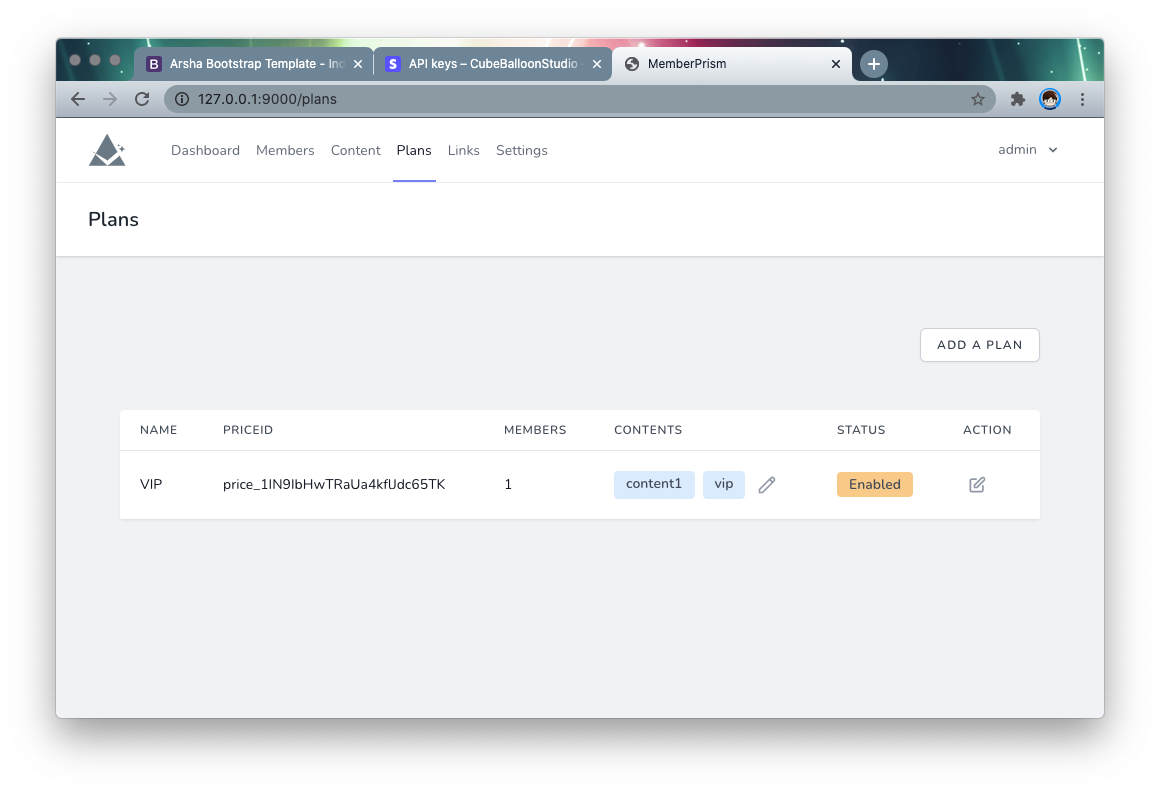
Go to the Content page of PrismSite and create a content.
- Folder or pages URL: the protected directory or pages, in the above example, fill in
/vip - Match type: StartWith means the URL is protected as long as it starts with
/vip; Exact means exact match - Redirect for non-members: The description page to be redirected to when non-members visit. This is usually the sales page for subscriptions.
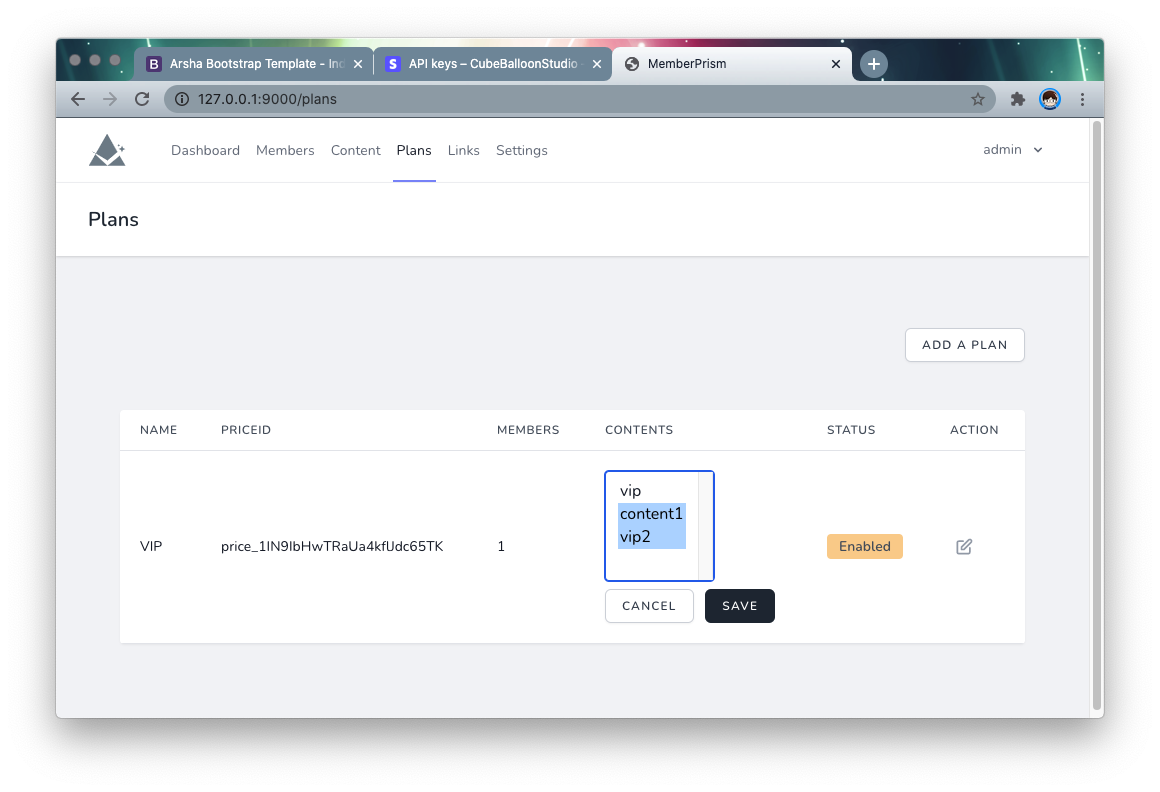
Assigning content to a subscription plan
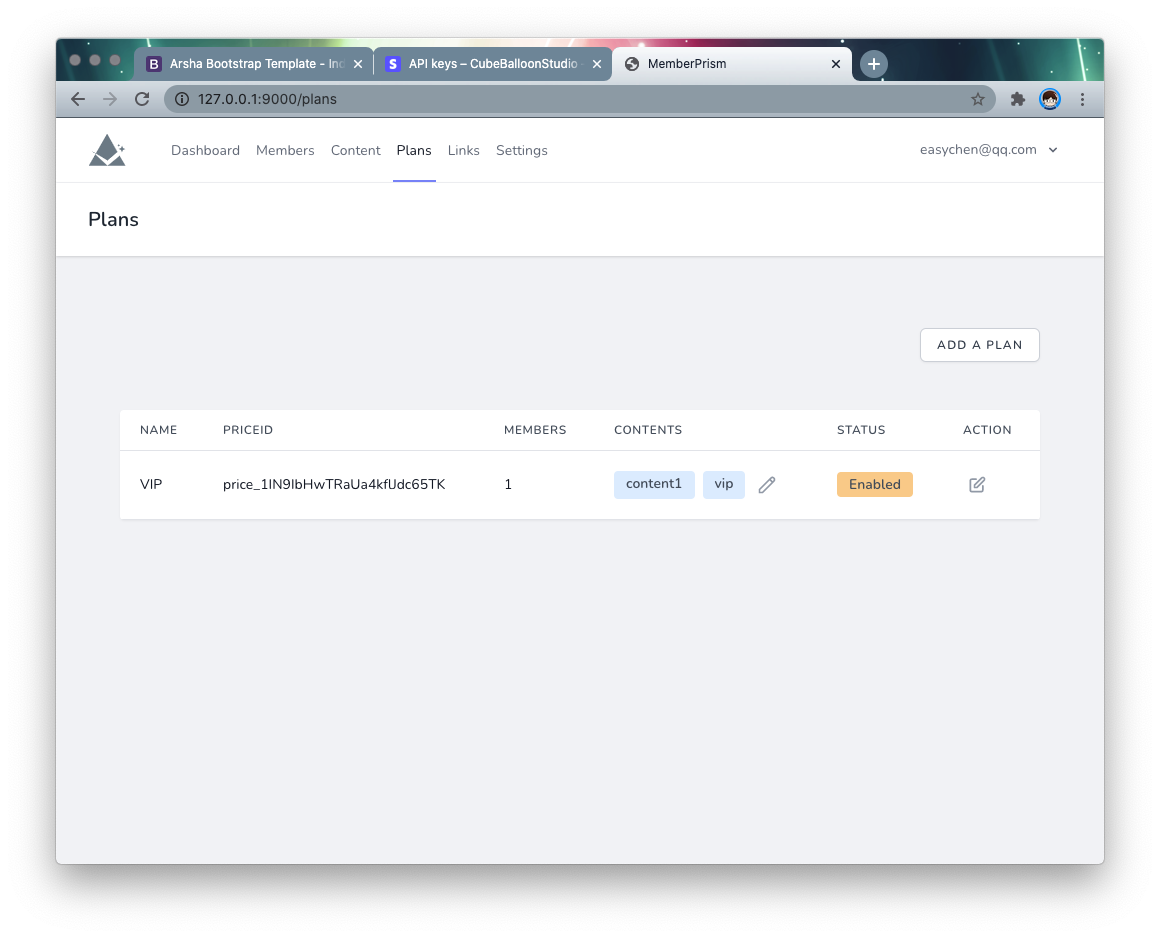
Go to the Plans page of PrismSite and you can assign member-visible content to the subscription plan. By clicking the edit icon in the Contents column of the list, you can select which content is available to members of this plan.
Here Content can be multi-selected, hold Shift /Alt to select more than one.
Hold Shift /Alt to select more than one. picture 13
After saving, the front-end protection will take effect in real time. The back-end protection will take effect after the user login expires (default is two days).
Modify the PRISM_MEMBER_EXPIRE_DAYS setting in web/.env to make changes to the expiration time.
PRISM_MEMBER_EXPIRE_DAYS=2
Back-end protection
Principle
The principle of front-end protection is that we add some JavaScript code to TargetSite that checks regularly, and when the user visits the protected URL and is not a member, we make the browser jump to another page. This way the protection is achieved.
But in reality, the content is actually already in the browser, it’s just not displayed, or it’s displayed for a very short time. The content can actually be found by looking at the HTML, for example.
To support scenarios that require more stringent protection of user content, MemberPrism provides proxy-based back-end protection.
The principle of back-end protection is that the user accesses the TargetSite, but now accesses the ProxySite instead of the TargetSite directly. The ProxySite will first check if the user is accessing member content, and if they are a member. If the permissions are not enough, they are redirected directly.
The difference is that in the back-end protection scheme, the member content is not sent to the browser, thus achieving true protection.
Usage
Go to the Settings page of PrismSite and pull down to the bottom.
Fill in the Source site URL with the URL of the TargetSite and the Proxy site URL with the URL of the ProxySite (that is, the URL that the end user accesses).
The page will be redirected to the Proxy site URL after a successful payment, etc., so be sure to fill it in correctly.
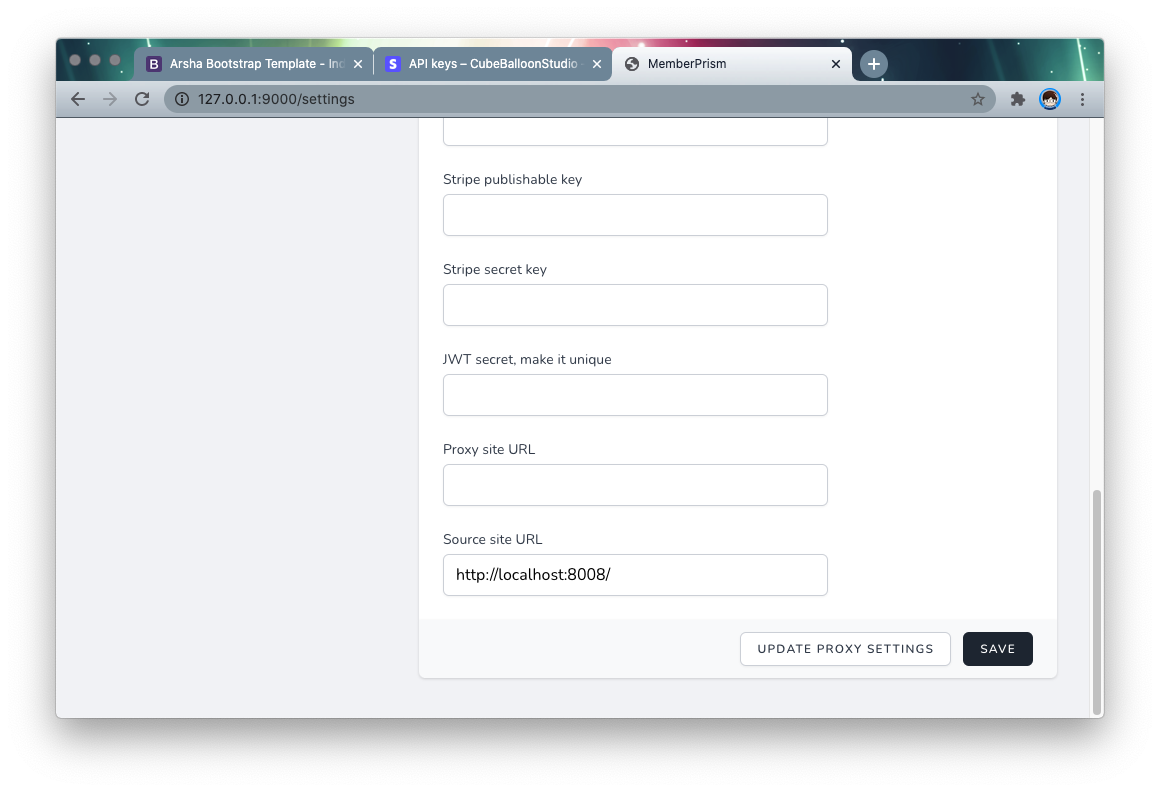
When you are done, click Save to save. After the page is refreshed, click Update proxy settings to generate the proxy settings. Each time you update the proxy-related functions in the future, you will need to manually click once.
If the configuration is correct, the user should be able to use it normally via the Proxy site URL.
Security
In the previous configuration, TargetSite and ProxySite can be accessed at the same time. Users who know the TargetSite URL may be able to bypass the back-end protection.
Here we just need to add IP access restrictions to TargetSite, for example, so that it can only be accessed by the IP of ProxySite, to prevent the above potential problems.
More
About the author
- HP: https://ftqq.com
- Twitter: https://twitter.com/easychen
- Email: easychen(a.t)gmail.com